Inferno

Project Overview

Third person movement shooter with a focus on speed running created in a team environment, my responsibly on the project was to design the main player character's 3C's along with managing the team responsible for its delivery.

Resonsibilities

- Main character 3C's

- Main character movement abilities

- Game UI/UX

- Leading character strike team

Main character 3C's

The core design goal was to create a fast and fluid-moving character which blends combat and traversal, allowing players to express their skill. I started with defining the states the character could have, along with their actions, and with how they would enter/exit said states. To solidify and align the design with the team, along with setting expectations for how the character would traverse the play space.
 
Then I proceeded with writing feature specifications for each element of the 3C’s along with creating in-engine prototypes, which were used to guide discussion and test initial player experience. These tests were positive, and with validation from the design team and producer, I discussed implementation with a programmer assigned to my strike team.
 
Together, we implemented the character into the engine. The core technical challenge was the wall running, primarily detecting when to start and stop a wall run.
 
For detection, we utilised line tracing from the characters’ sides, which, while functional, only detected wall running when the sides touched a wall. This was resolved by adding a cylinder collider, which would determine which direction the player should go in, depending on a dot product, calculating if the character is either facing more to the left or right when hitting the wall. This solution was not perfect, as head-on angles would appear random due to slight variance, causing a direction swap.
 
Another technical issue was curved walls; making the character follow the wall was doable with a lerp for the rotation. This still required multiple iterations for edge cases with the character rotating too slowly to stick to a wall, or sticking too much. This also impacted the camera since it was a component in the player actor, which meant it rotated with the character, causing the camera to snap often. To resolve this, we implemented a logic bypass to ignore the character’s rotation while wall running is active and instead softly lerp to the character’s facing direction, with the player being able to overwrite and stop this process via mouse aiming inputs.
 
The final challenge was making the player feel fast. From a mathematical perspective, the player covers a lot of ground, but play testers responded that they did not feel fast. My resolution was to dynamically change the FOV of the player camera via a lerp based on the vector length of the player’s current velocity. This worked, and alongside some visual effects of wind lines, it made the players feel fast.

Video of the final 3C’s in action during gameplay, the core feature of the kit was wall running. Done via line traces send from the player’s side to detect if they are colliding with a wall. What walls can be used for wall running is set by a gameplay tag.
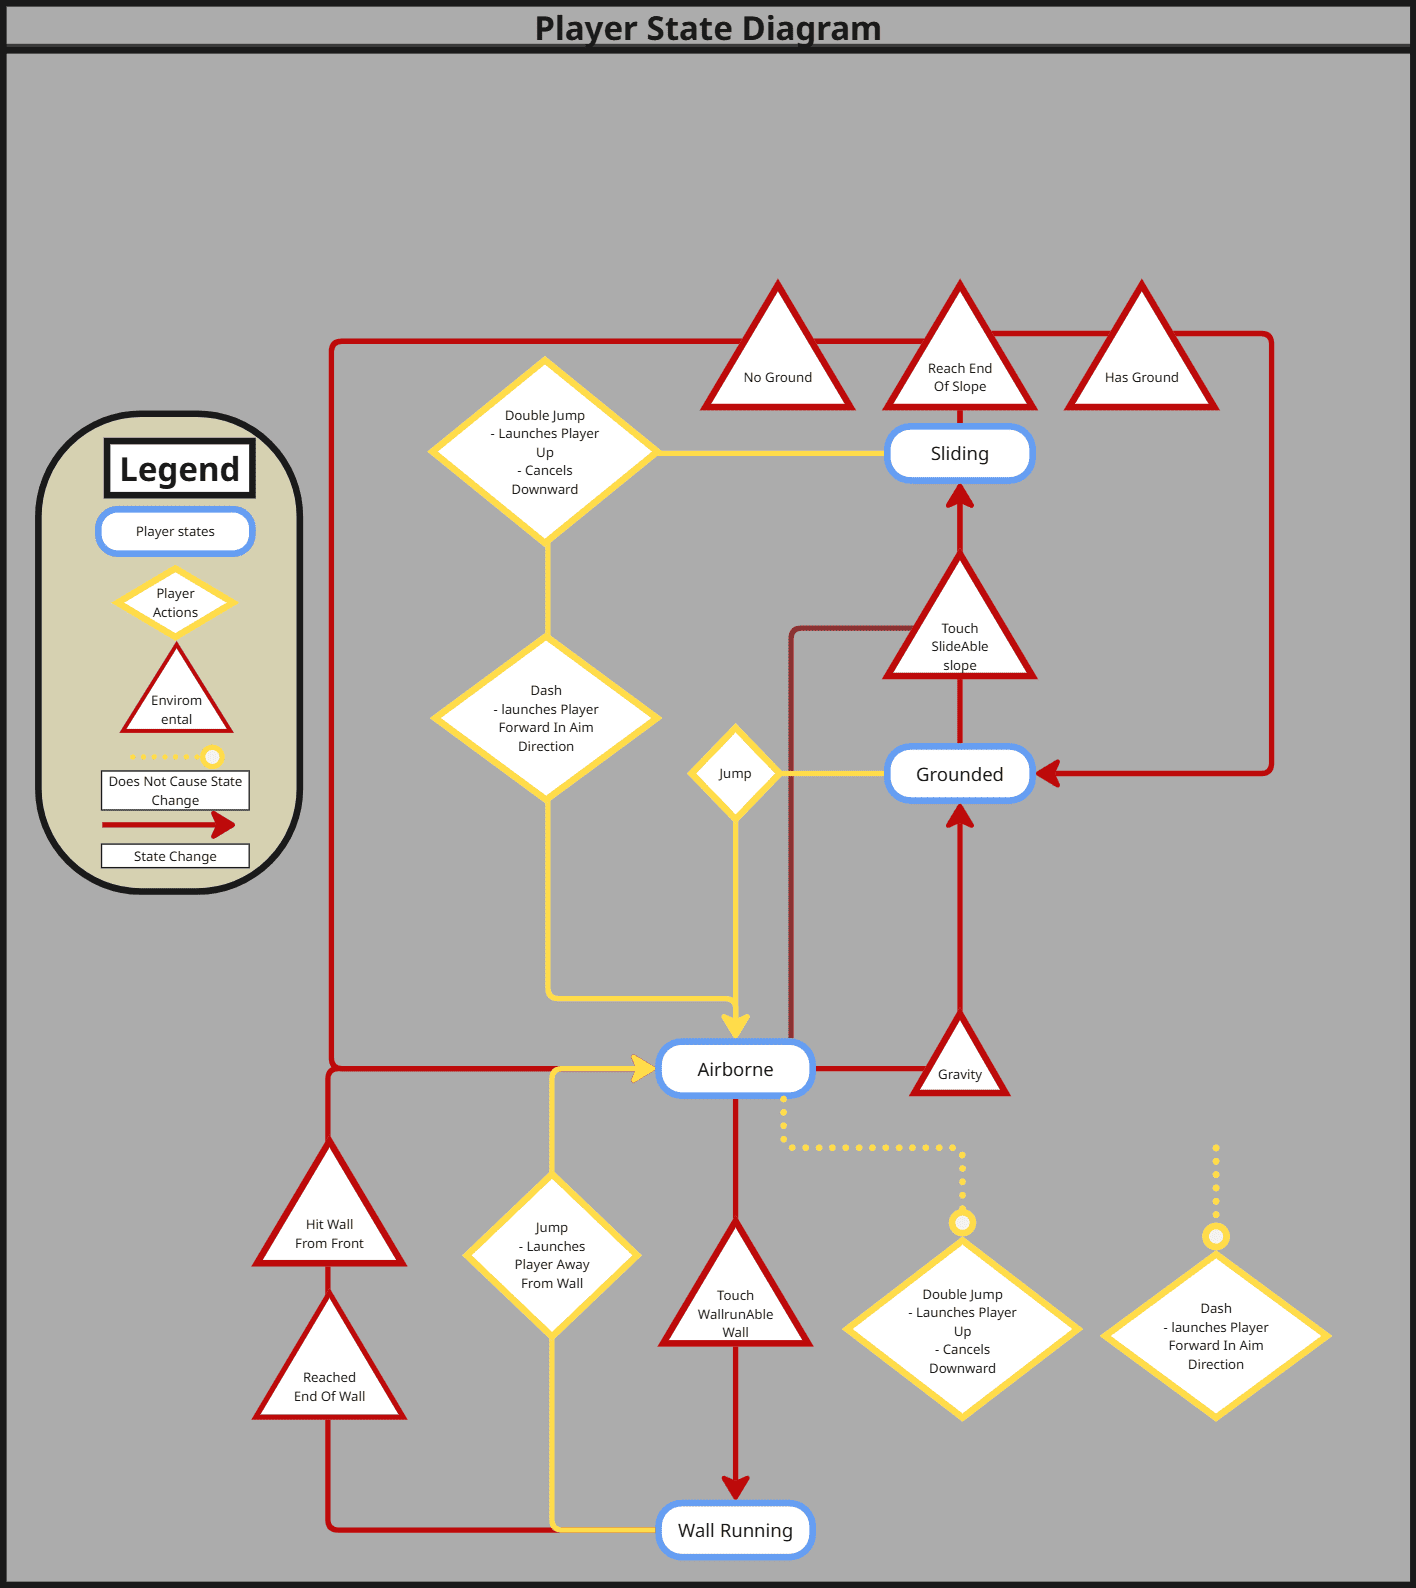
Player state Diagram I created during concepting phase, this includes wall running, movement abilities and sliding. Sliding was a cut feature due to underutilization during the level.
[Click the image to enlarge]

Movement Abilities

The character also included two additional movement abilities on a charge system. The player starts with a charge and can then spend it on either a double jump or a dash. Once consumed, the charge is replenished by touching solid ground or killing an enemy. The player may only hold a single charge at a time.
These abilities were how traversal and combat were tied together, as eliminating enemies allows the player to utilise their movement abilities more often. Core technical challenge for these was regarding their functionality related to vectors, primarily whether they should cancel, stack, overwrite, or pause various vectors of the player.
 
The initial implementation of the dash added forward force while satisfying it and was also hard to control due to it stacking additively with the character’s already existing forward vector; it would also decrease in effectiveness if trying to dash away from the player’s current vector. Furthermore, it received negative feedback from both play testers and our level designers due to feeling inconsistent, which made level design and gameplay more challenging and frustrating, so I changed it to a freeze. Instead of adding velocity, it sets it to the maximum character speed and locks the character into the direction of the player’s aim for half a second. This made it consistent, which made the players feel in control and allowed the level designers to utilise metrics to accurately gauge the length of the dash for their designs.
 
The double jump had originally also added force, which made it suffer from the same issues. To resolve this, I made it cancel out any downward velocity and provide upward velocity alongside launching the player forward slightly.

Showcase of player abilities and how they function in their final implementation in the live game.

Game UI/UX

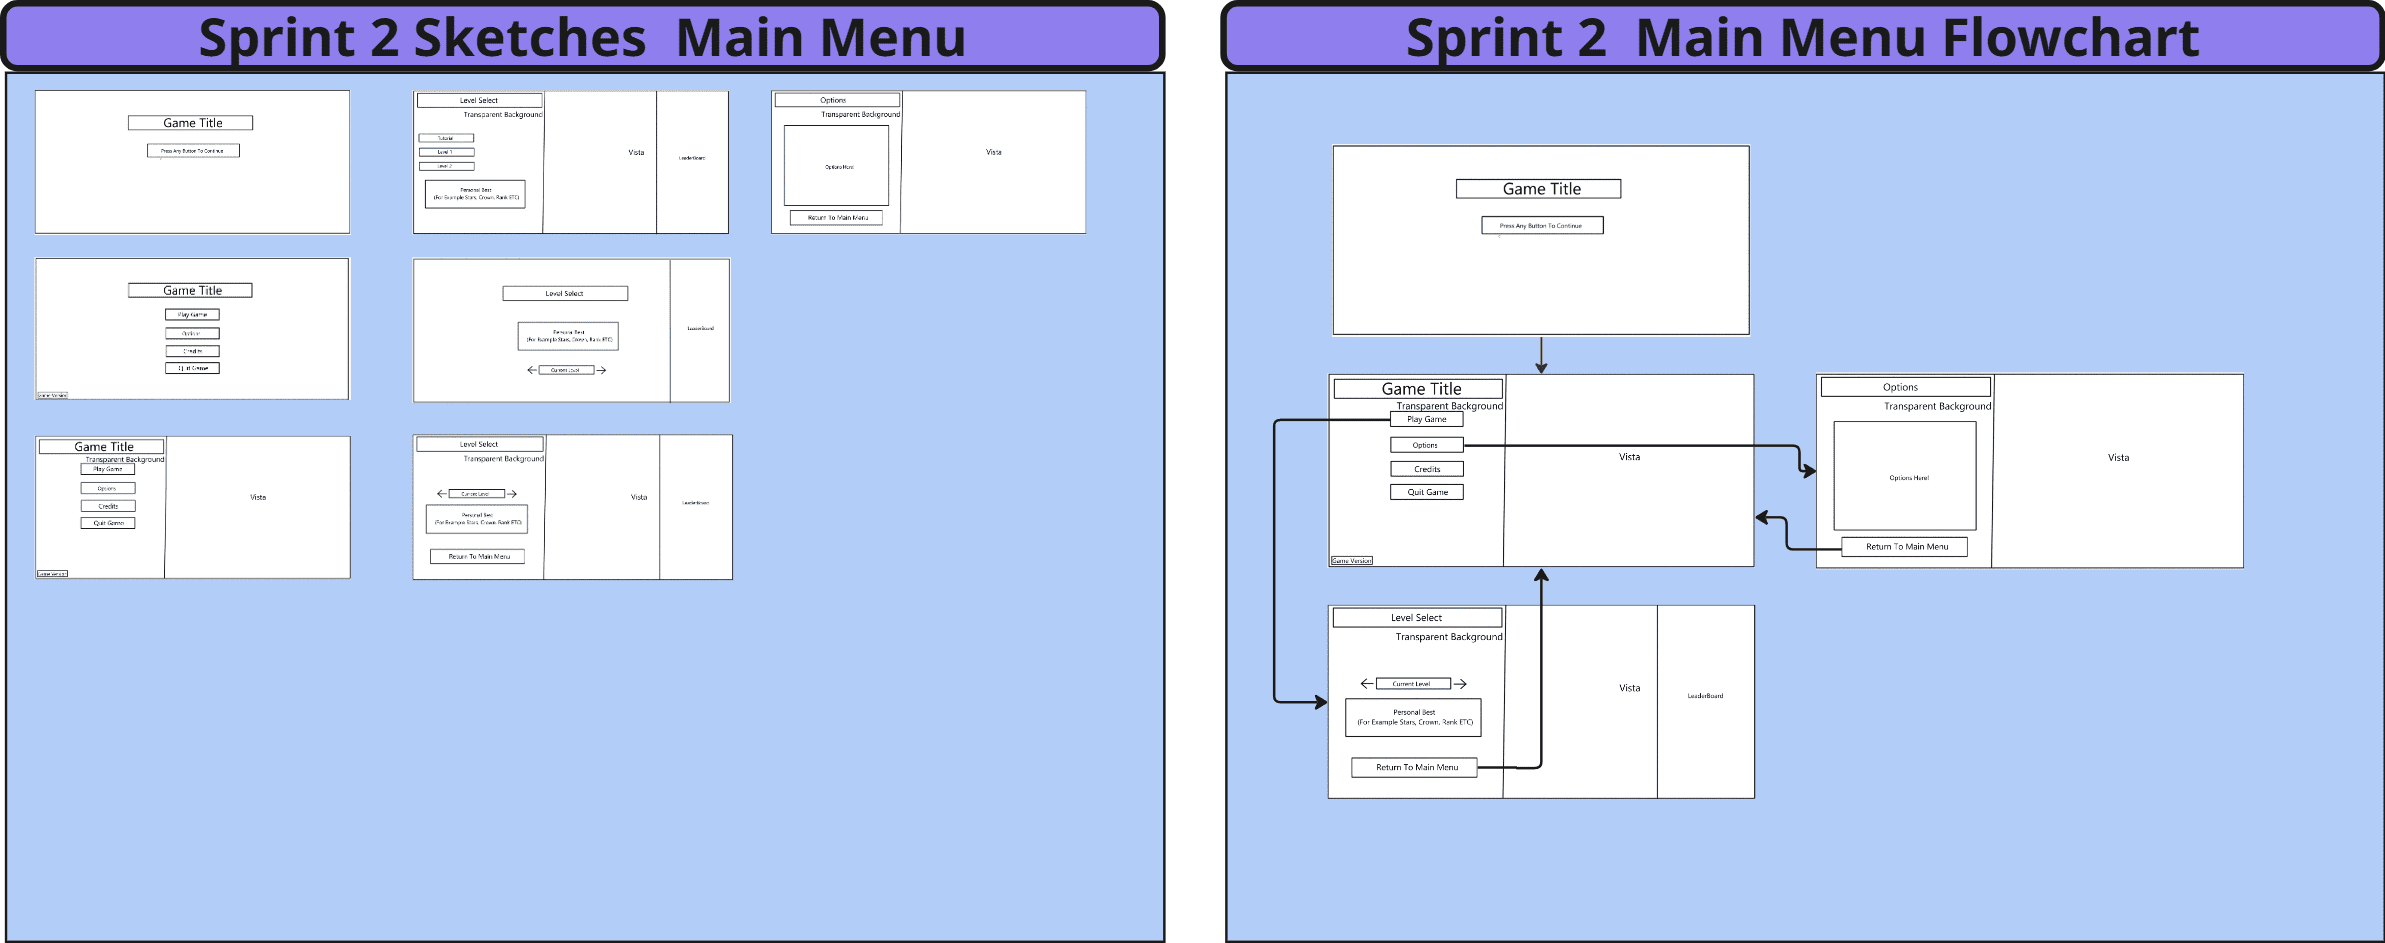
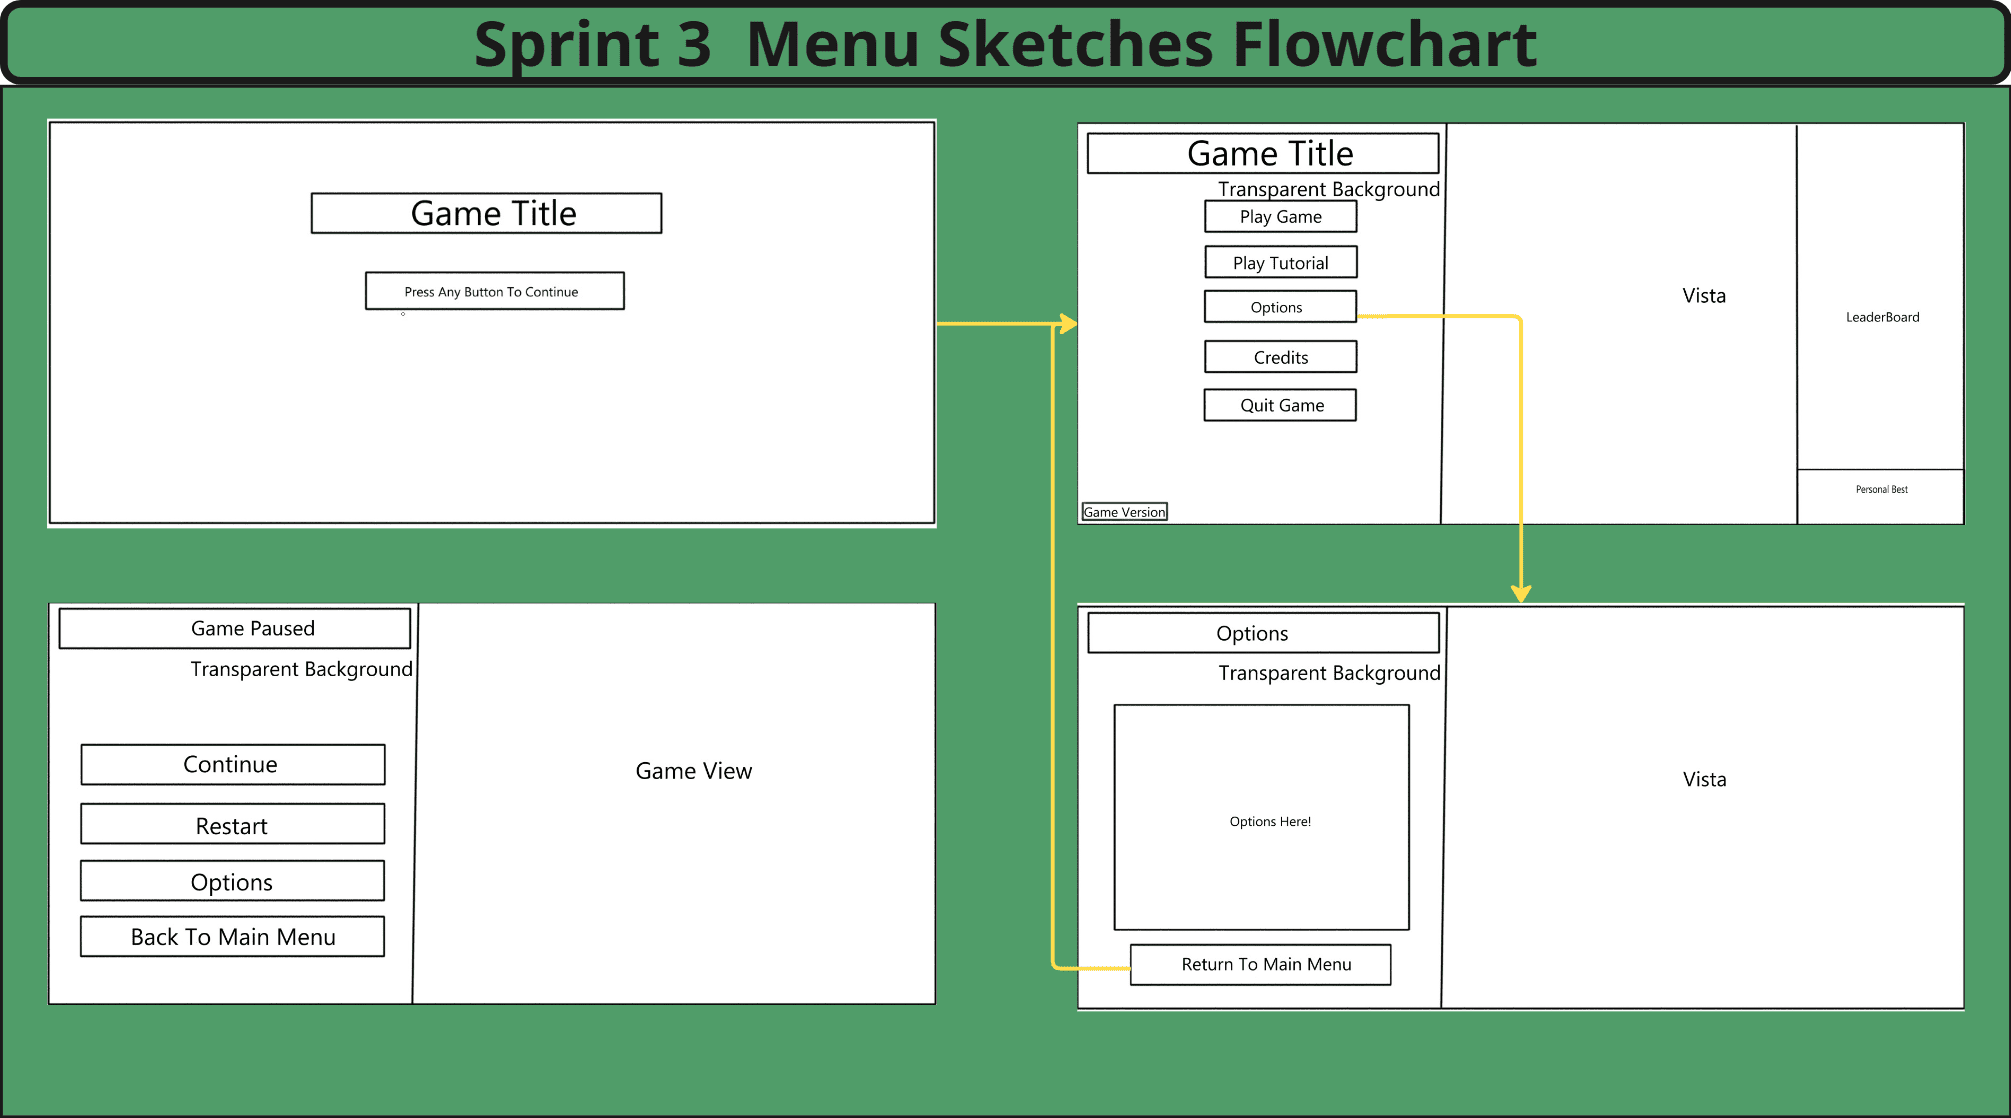
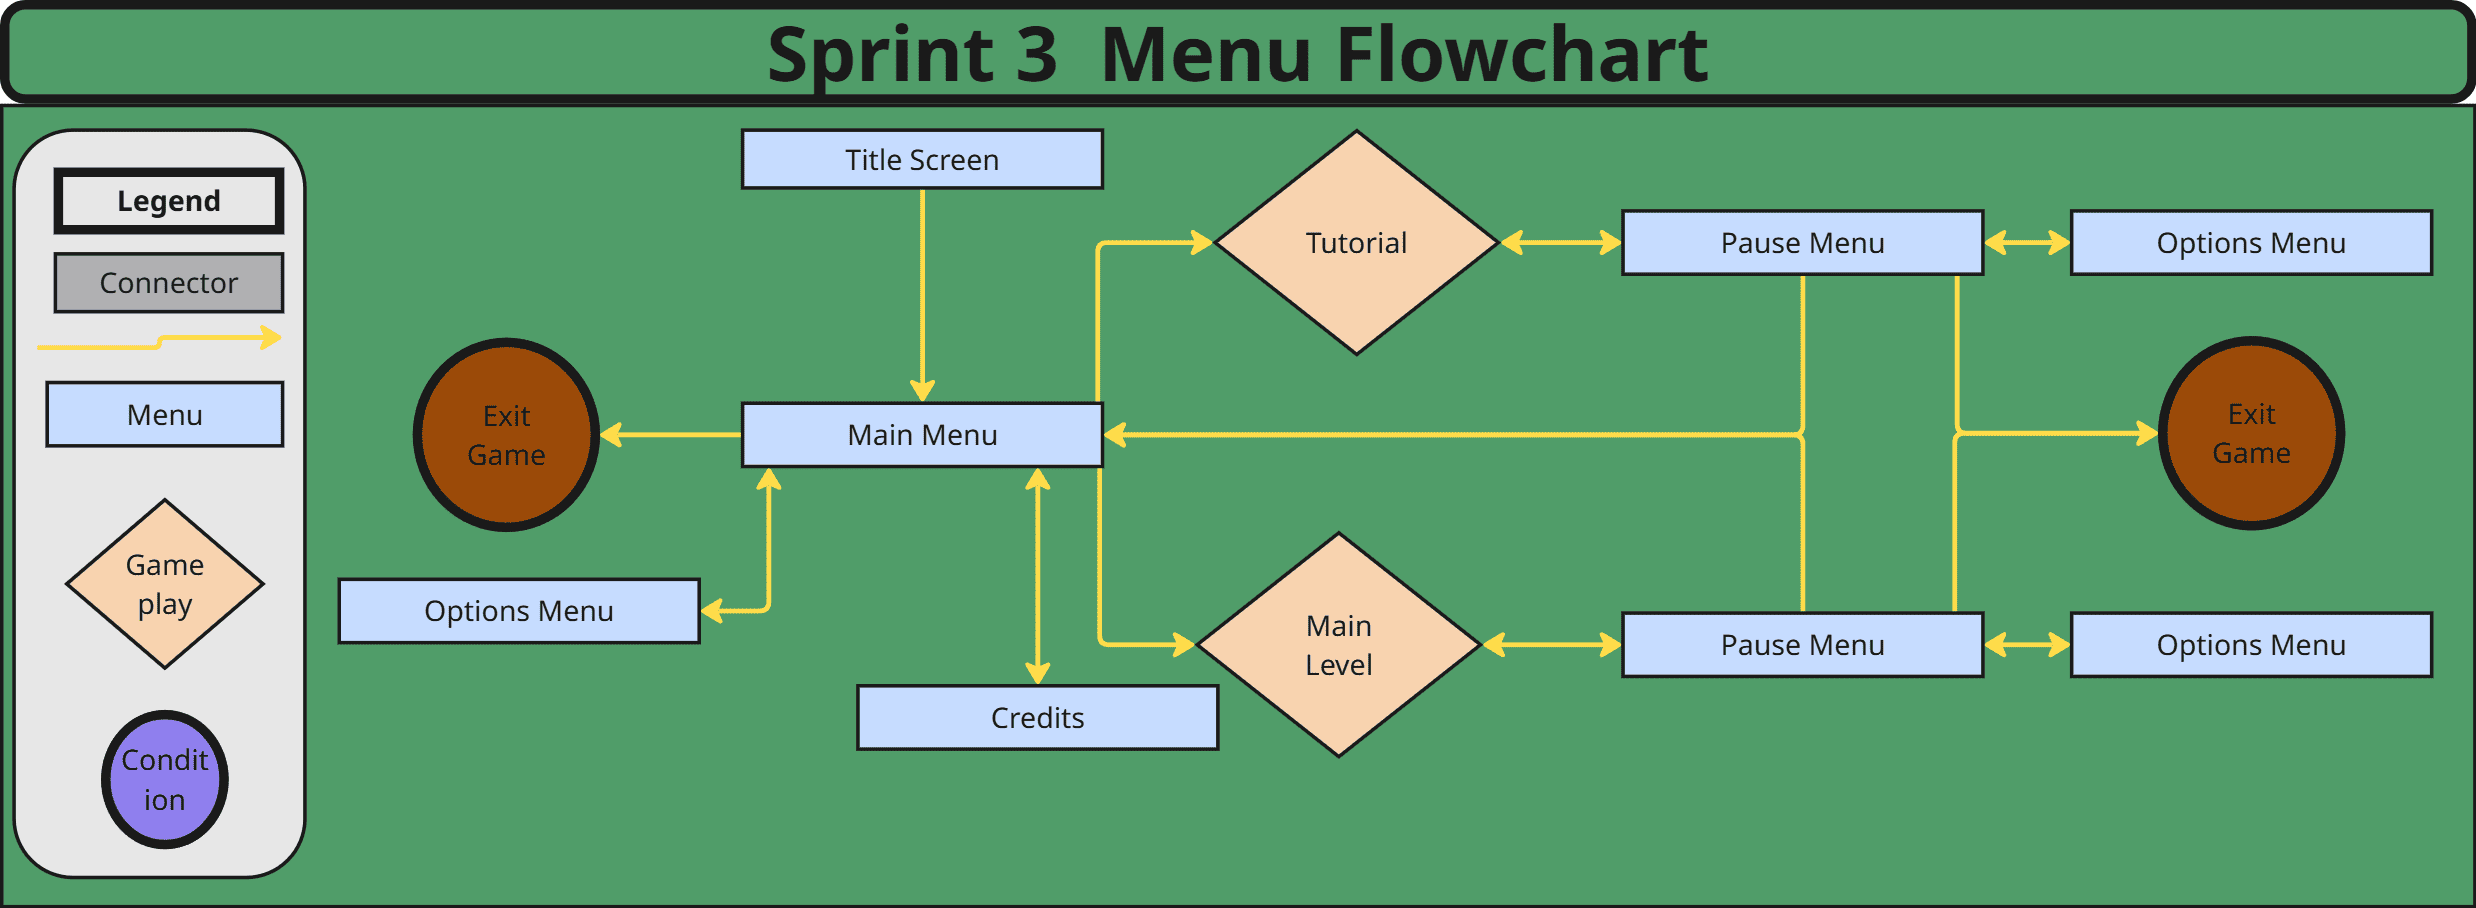
I designed the UI for the menus, leaderboards, tutorial widgets and player HUD. I started early via concepting and logic and menu flow of the menus, making sure even our earliest prototypes were playable and had functioning menus. Allowing for early playtesting.
 
This was my first project where I utilised UMG; much of my time was spent learning how to create modular widgets and communicate with widgets to procure the required information I wished to display.
 
From a tech perspective, the hardest UI element was the leaderboard, both in terms of logic and design. For the leaderboard functionality, I utilised a bubble sort algorithm to compare and compile the leaderboard, with the leaderboard widget spawning row widgets which display the leaderboard statistics. With the help of a programmer, we made the leaderboard support both offline and online play.
 
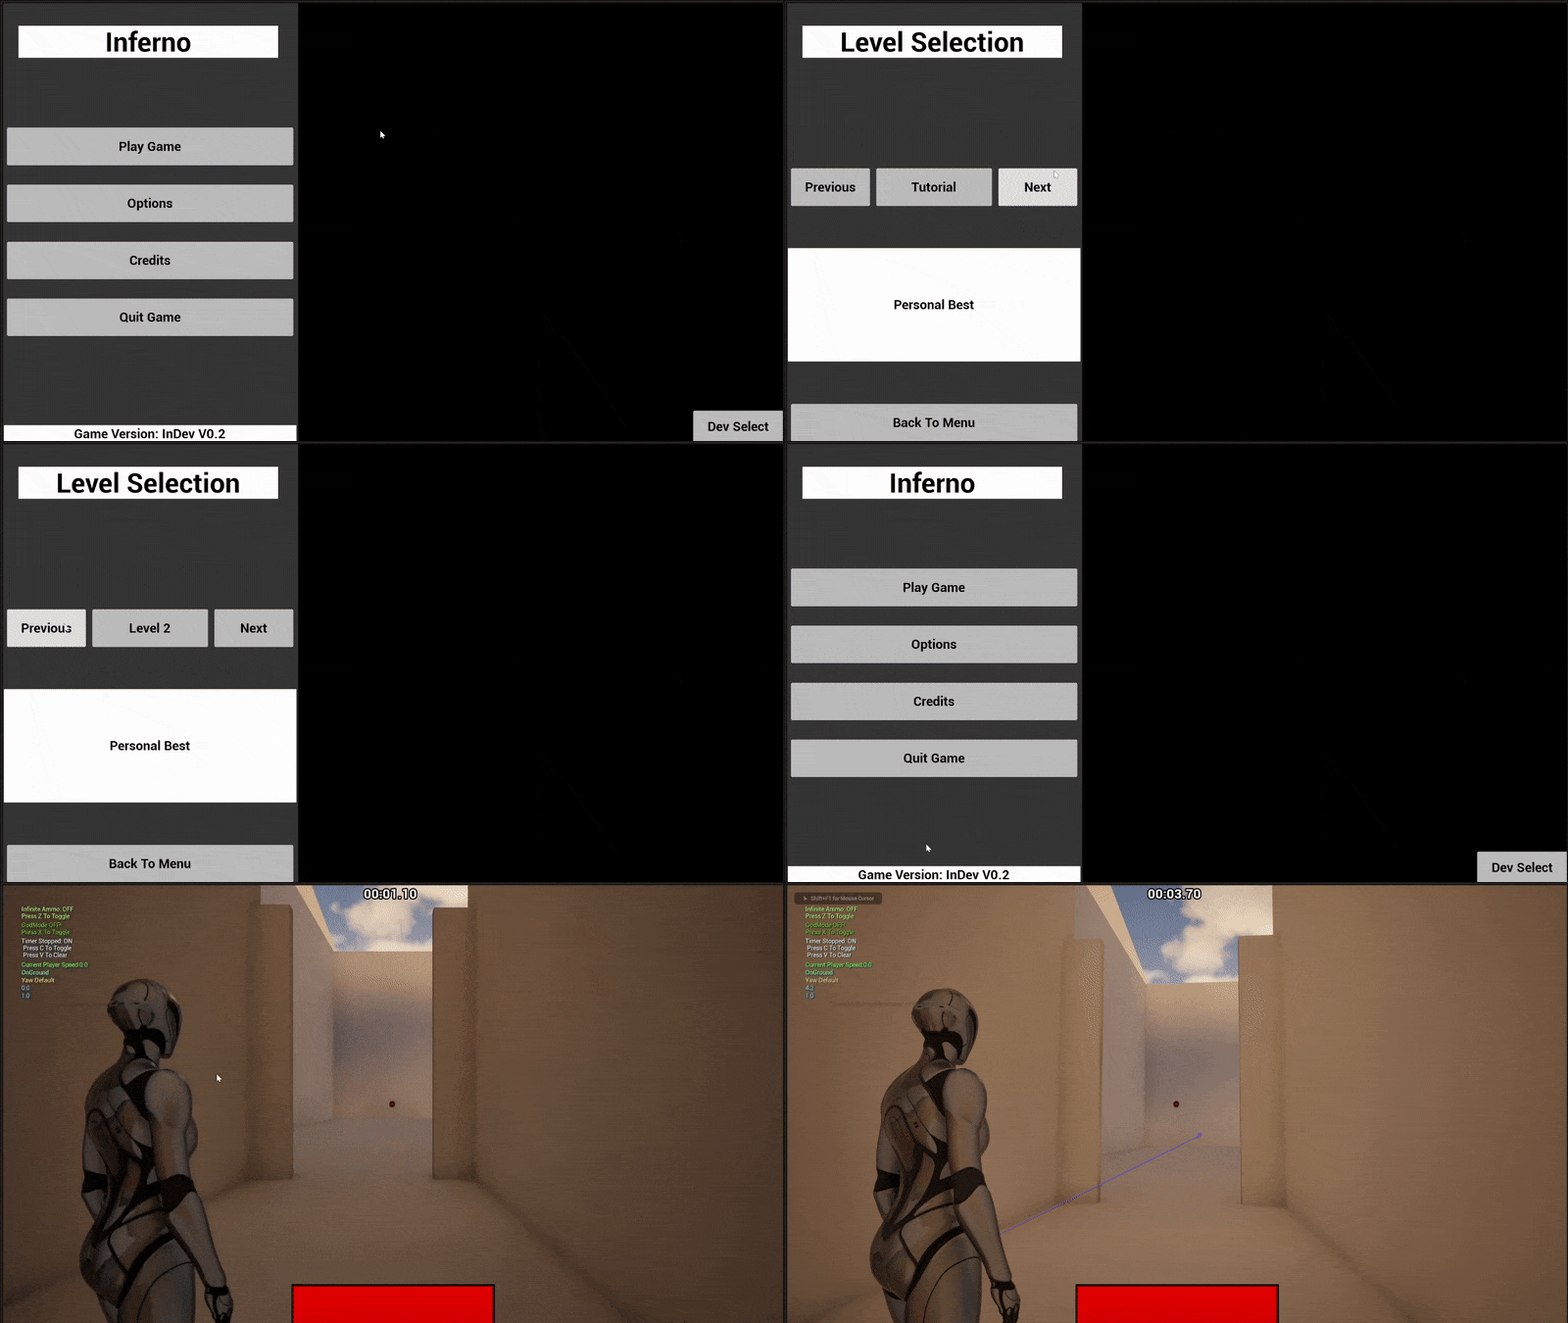
With the menu flow, my core focus was getting the player into the game as quickly as possible; one scrapped menu, therefore, was a level selection, instead replaced with two buttons to play the main and tutorial levels. As it requires one less button press, alongside that, we decided that no more levels were going to be added.
 
I created the tutorial widget at the request of our level designers, as they desired the ability to display information on screen to guide the player. For this, I created a dynamic widget which could be called and constructed with a specific text and a specified area; it was visible to players.
 
The player HUD was focused on minimising on-screen elements as much as possible. This decision was made due to the fast-paced nature of the game, which would make it easy for players to get either distracted or be unable to read the UI during gameplay.
 
I instead implemented the HUD into the player where possible, for example, the movement ability ready state is displayed on the player via a sigil with white signalling it is ready and red signalling it is unavailable. Other elements were mainly kept to the edges of the screen to keep the centre space clear of distractions; damage would display red and fractured lines around the edges, and speed would display speed lines around the edges. For the health indicator, it was too subtle to the point that players did not notice they were taking damage, so the effect had to be intensified slightly.

Showcase of various UI elements in the final build of the game.
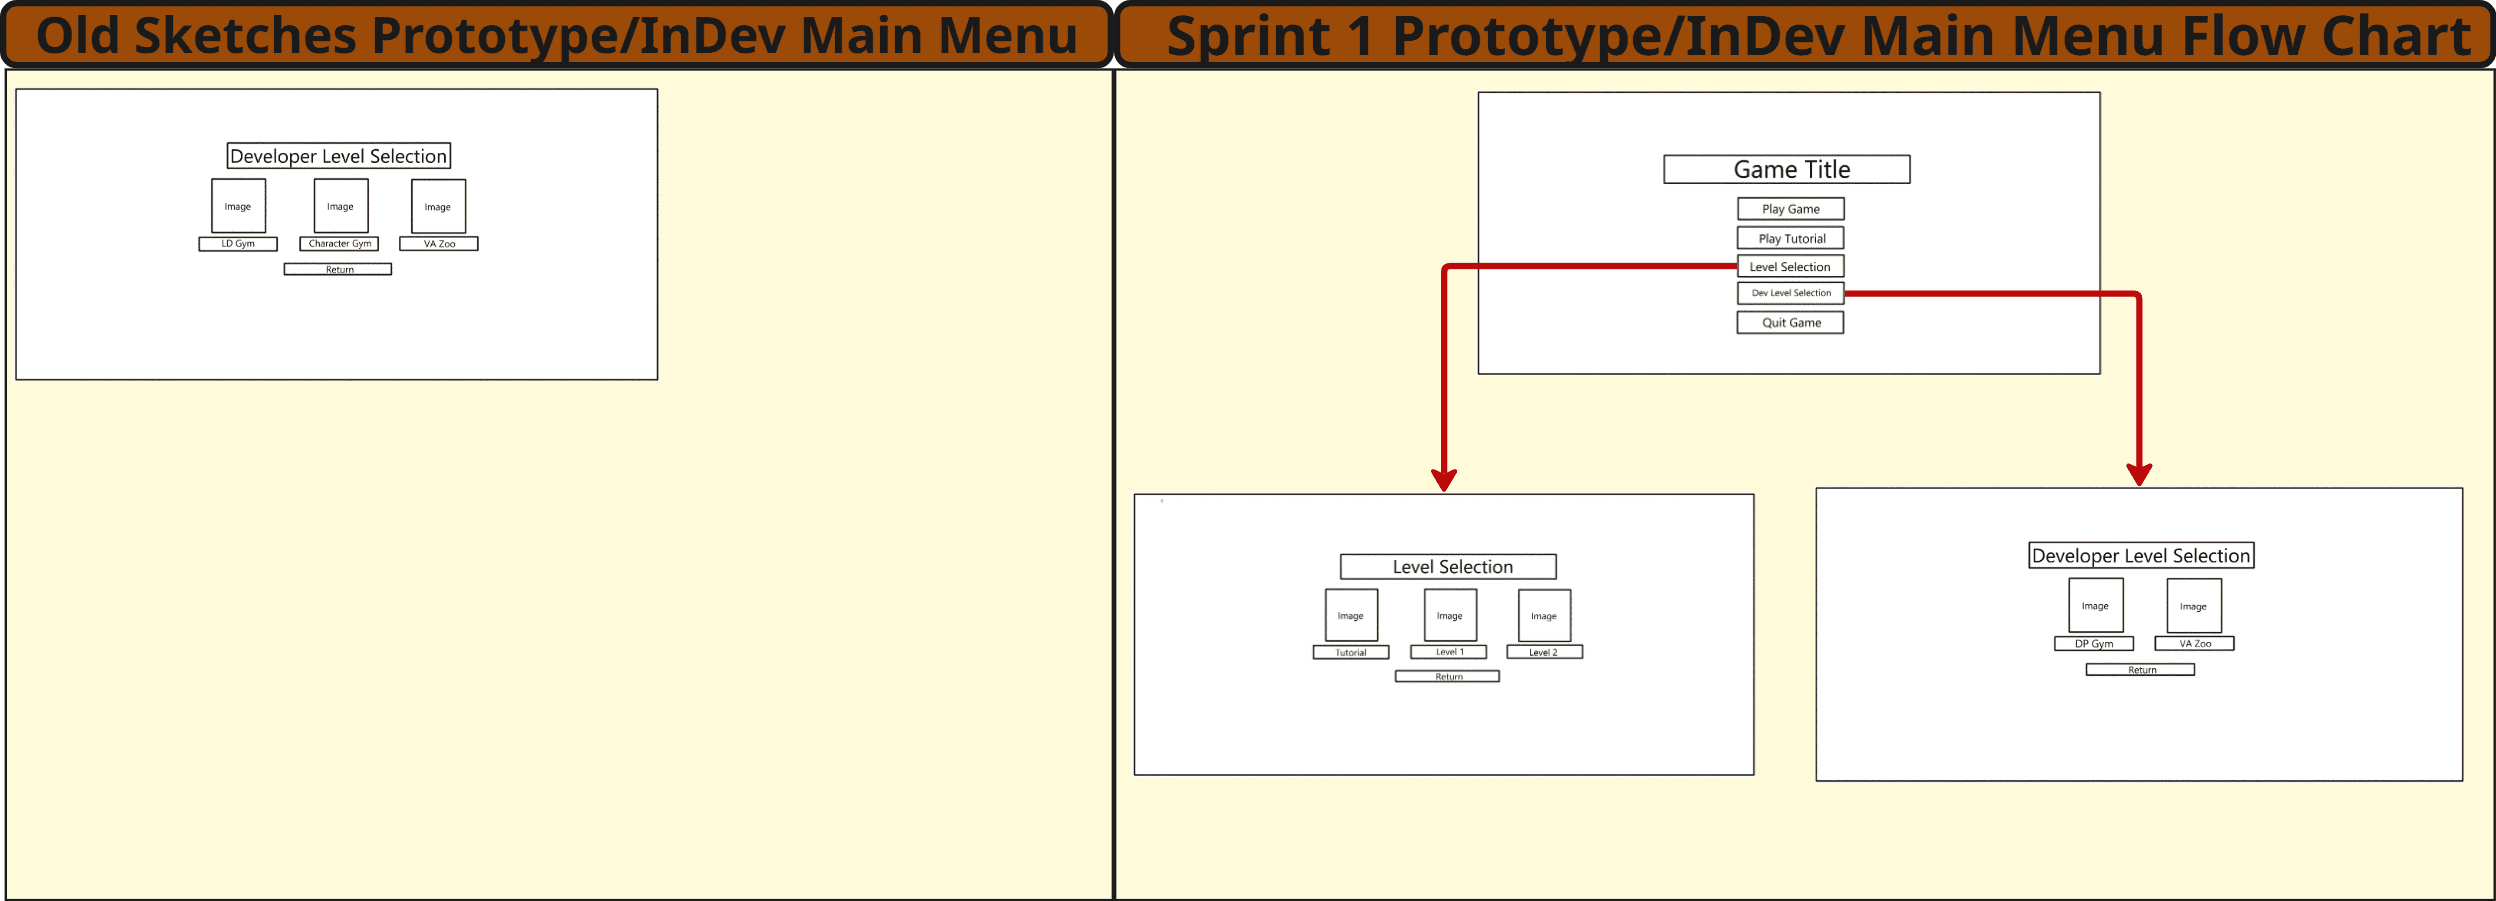
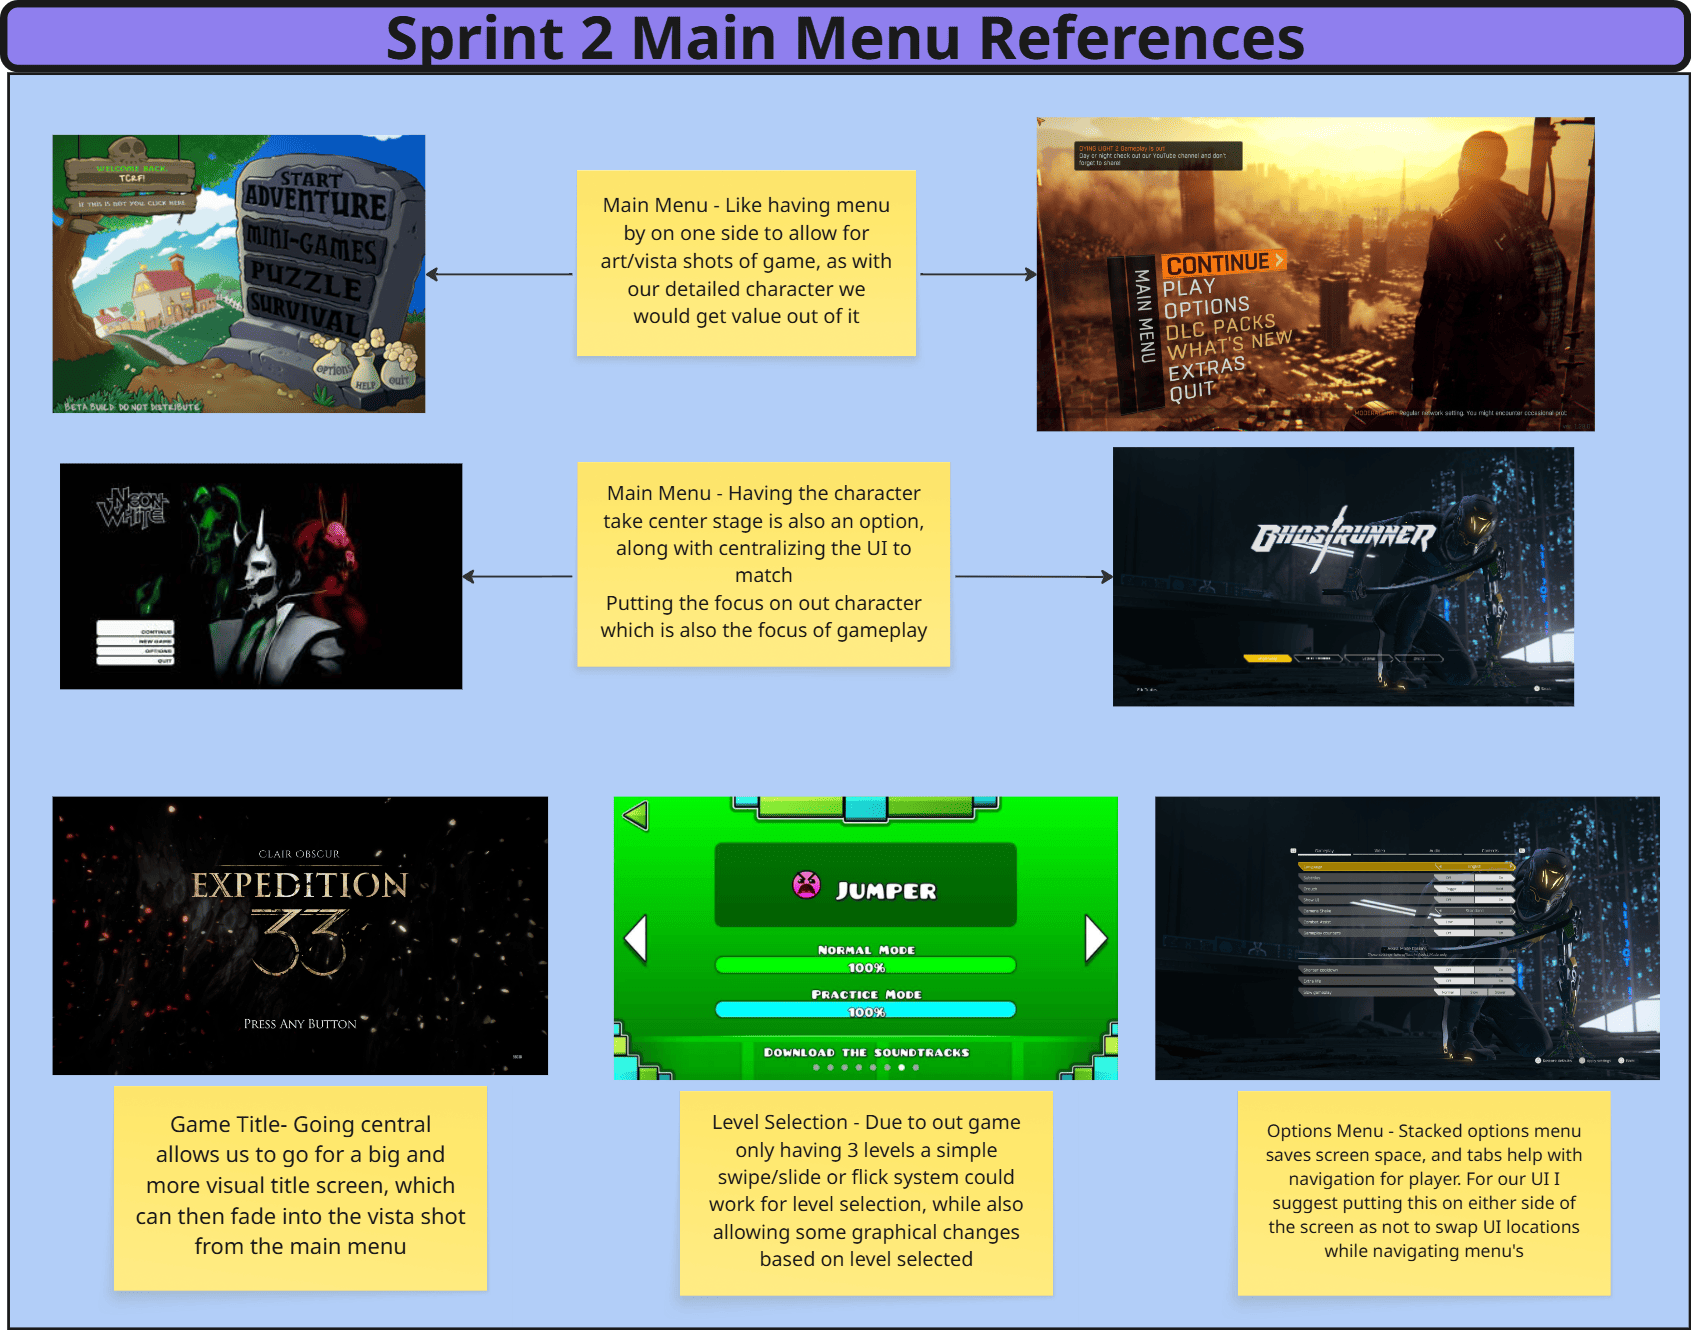
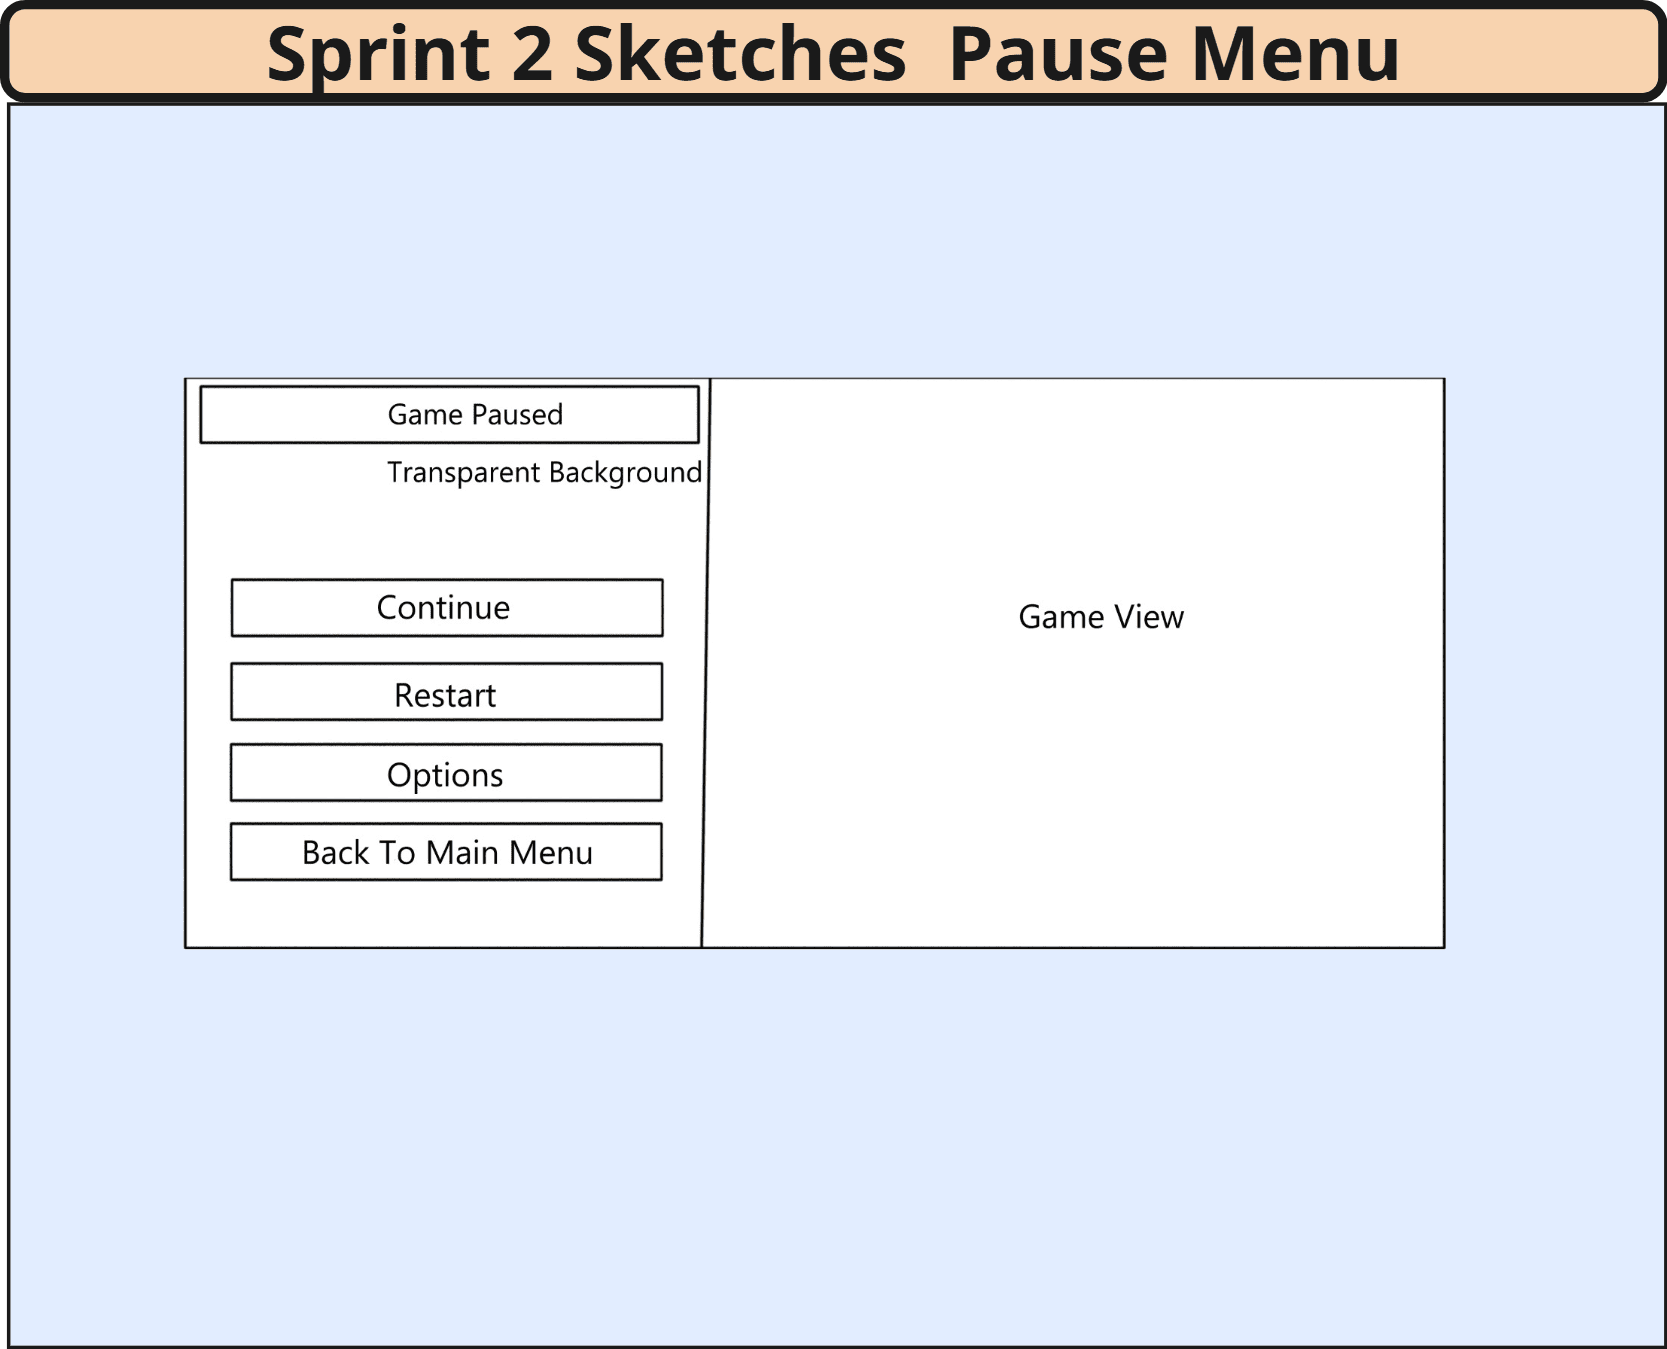
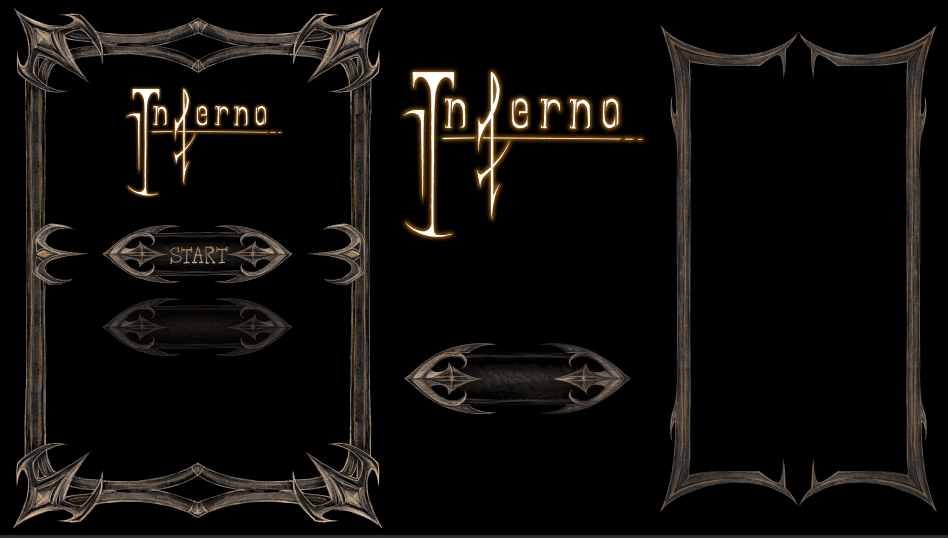
Showcase of various sketches, mockups, menu flow diagrams, and in engine prototype footage of the UI along with references I used.
[Click images to enlarge]
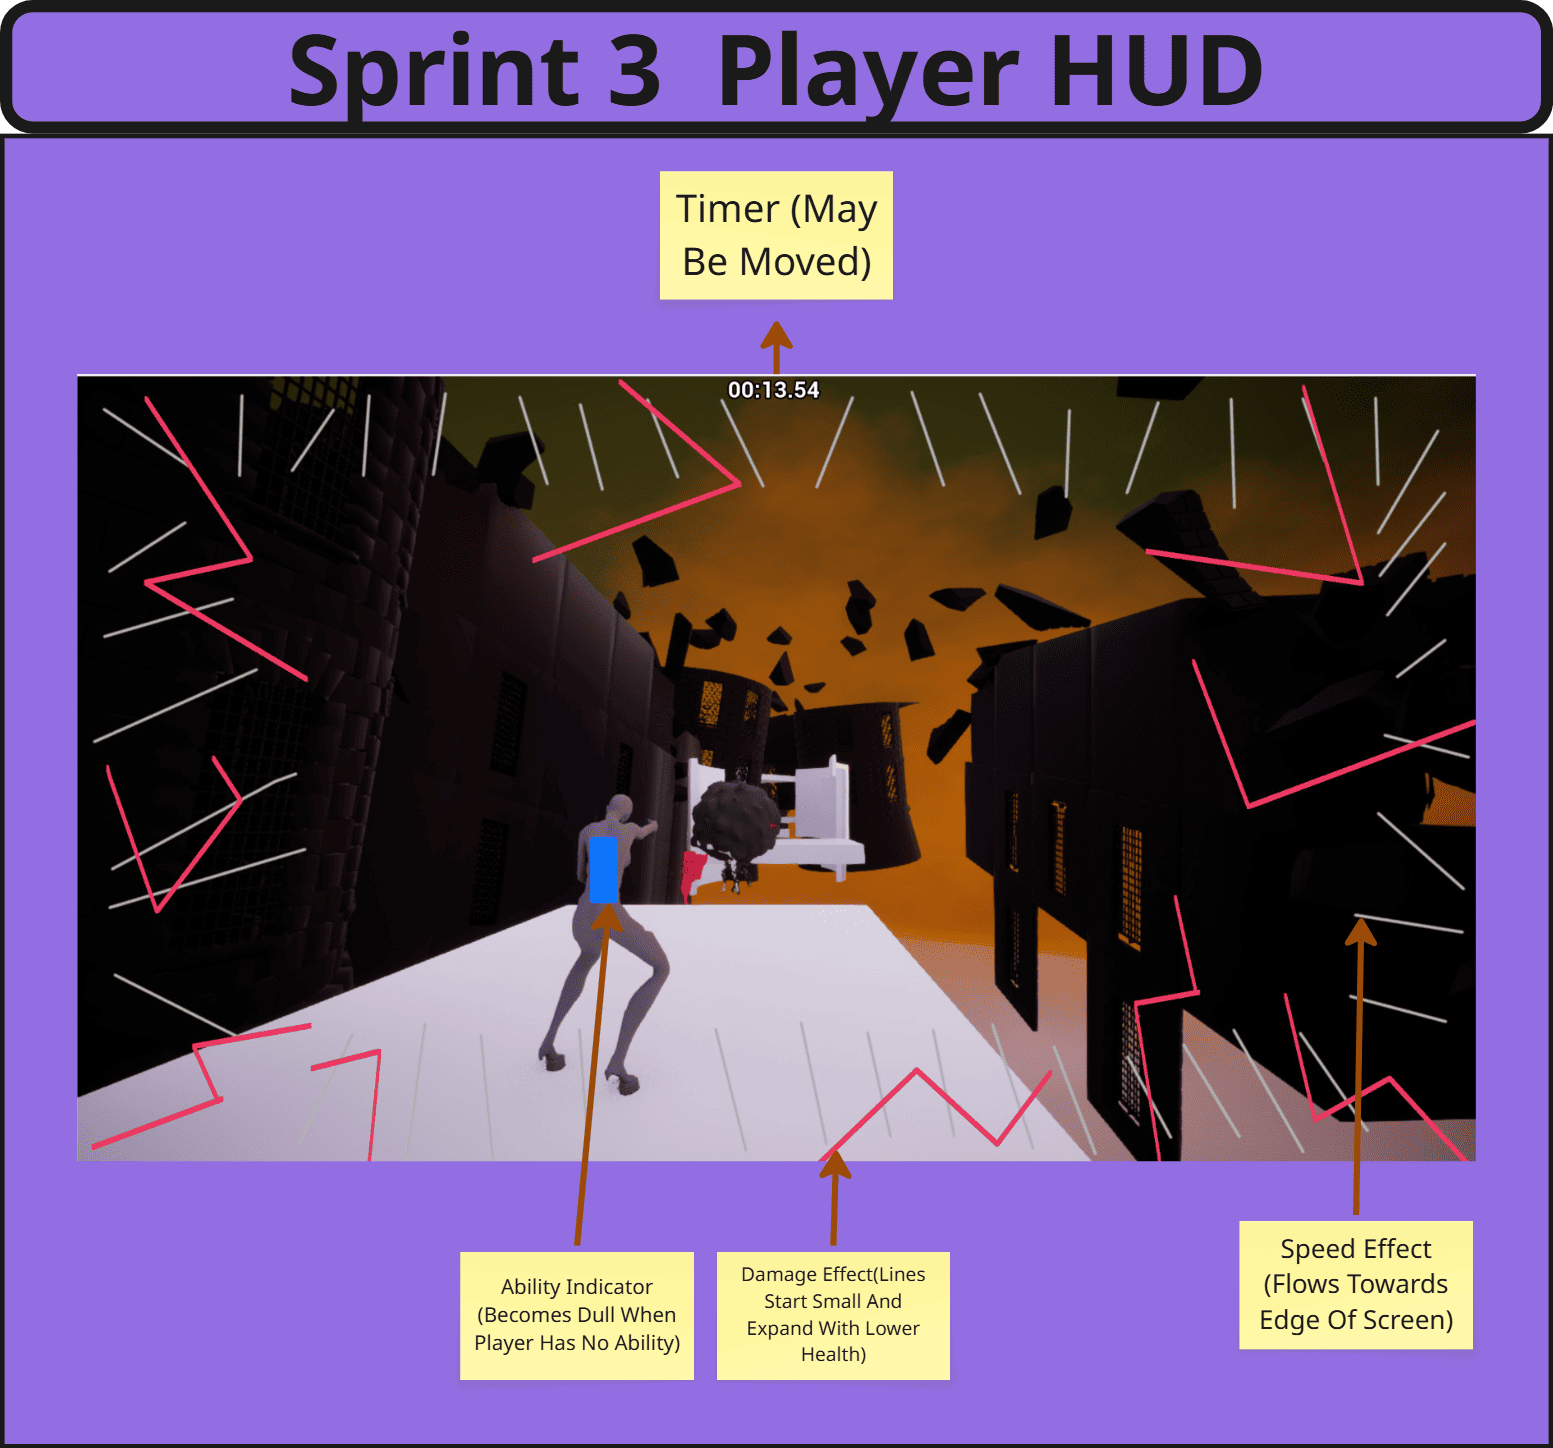
Mockup of the player HUD painted over a early screenshot of the game. [Click image to enlarge]

Scroll to Top